Big Game: Week 8

During the last week of the Big Game course, mostly small fixes was on the list. Stuff like;

UI_TutorialText

text for the tutorial in-game,

UI_PauseMenu.png

as well as text for the menus.

sc9

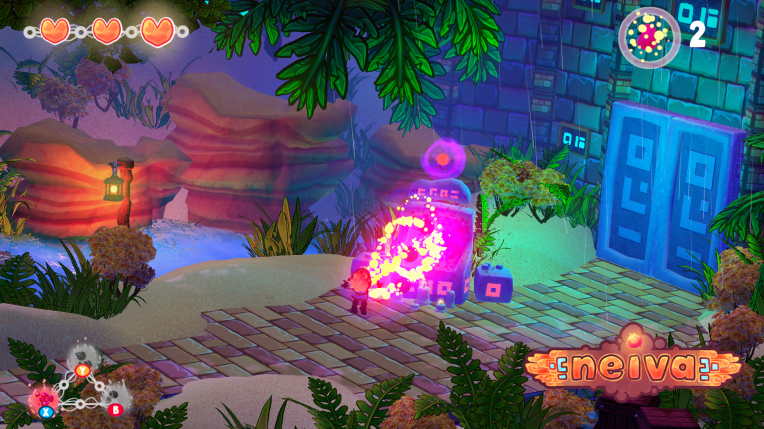
Props for the final scene also had to modeled and textured, like the altar which can be seen in the print screen above. It was modeled in 3DS Max, as usual, and the textures were created in Substance Painter.

sc3.png

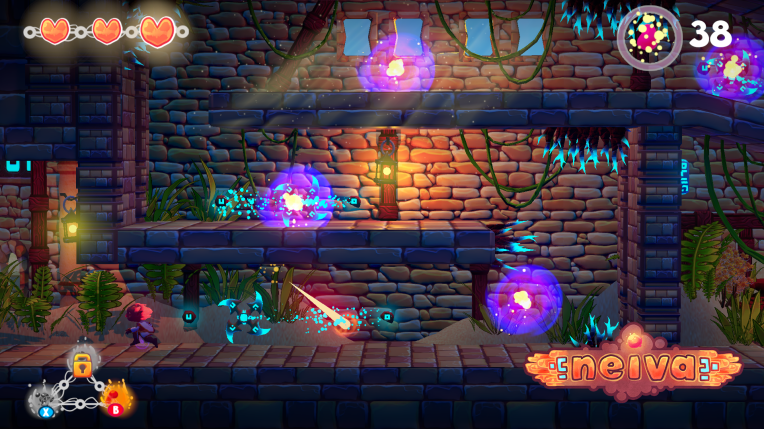
An example of the small props that I also created for this week was the lantern, which can be seen in the middle of this screenshot (as well as in the previous screenshot to the left).

Small fixes was also done to the UI, like scaling them to make it a better fit. Documents were also written, for the SGA turn-in and such.

Big Game: Week 7

Nearing the end, it’s just small stuff left to be done. I’ve been playing around a bit with particle effects, started working on UI and menu in-game as well as finishing some more decorative assets. Here’s a few examples of what I’ve been up to this week;

butterfly

Butterfly that will fly around in the background, as well as on the path  where they will fly away if triggered.

1

A crosshair for the projectile, which is animated in-game.

UI_Heart_1

Icon for life, which also is animated in-game.

visitkort

I also put together a design for our business cards which will be available at GGC.

drawbridgebullshit2i

We also needed a logo of our team name, for the trailer.

chest

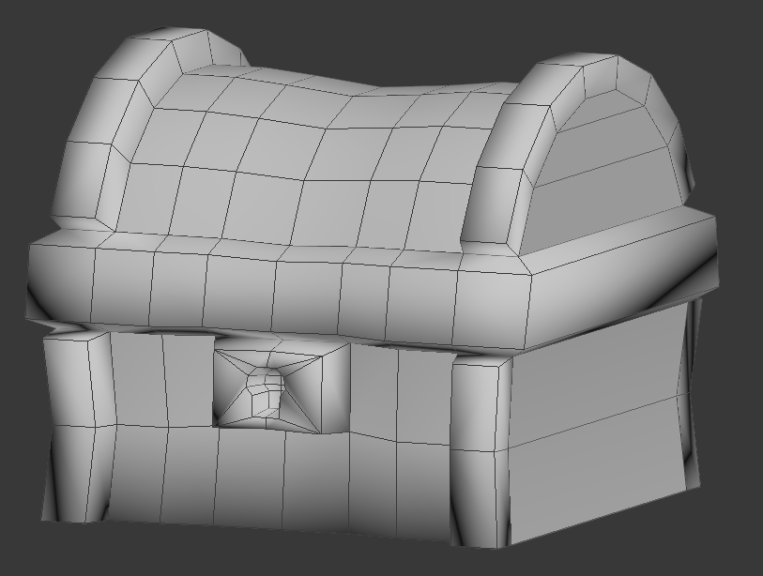
Created a few meshes of decorative assets that aren’t textured yet, since we might not need them at the moment.

controllerPAUS

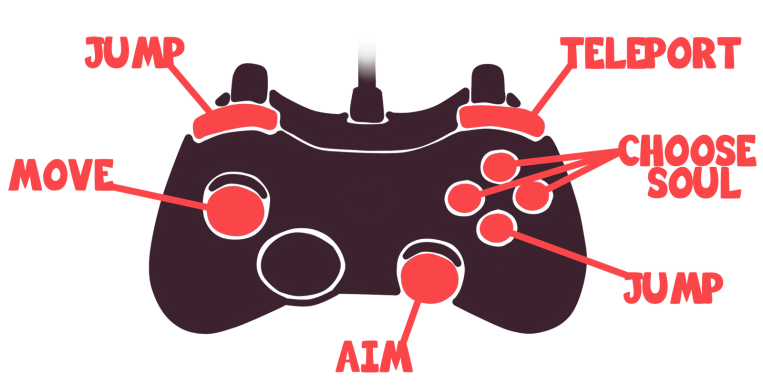
Also started working on the tutorial and menus.

Big Game: Week 6

During this week, we started focusing on getting the vegetation included in the environment. To create all the trees, bushes and grass; we used SpeedTree. It’s a super useful program when you want to create trees and such very quickly. My job was to create all the textures needed, while another artist in the group created the actual objects in SpeedTree.

Here’s how it turned out:

And here’s the textures:

Also finished up some background textures, like the houses in the background and other decoration stuff.

Big Game: Week 5

Since I finished all the character labeled assets last week, I started pitching in with the environmental art. Started out with doing some different kinds of textures for the houses, which turned out like this;

They are all created in several different layers so you can easily change the color to whatever you want, for example;

The messy stones will act as the ”standard” wall, while the other two will act as decoration on the walls. Like for example, putting them between two ledges on a house to create a break in the looping texture.

I also created some small textures for stuff like falltraps and buttons. Here’s an example;

This week, we also needed to start working on the logo, so I spent a lot of time sketching different options and then finishing it. Here’s how it turned out;

logo2i

Big Game: Week 4

Week four and halfway through, I managed to finish all the final meshes, UVW maps and textures for all enemies, traps and some random objects which will be included.

Here’s the final results of the traps:

Spiketrap, without normals or emissive to the left.

Bladetrap (with new design), with runes which will show the path the blade is taking. Might be changed later.

Push and pull traps, without emissive to the left. The purple one was changed to yellow emissive for now, since purple emissive didn’t work out very well. Might be changed later, to make them stand apart more.

Also started working with textures for the environment and such, nothing is completely done yet, though, so that’s more for next week.

Big Game: Week 3

During the third week of production, I started working with creating the final meshes for the enemies and traps, as well as creating the UVWs for all objects and work with the textures.

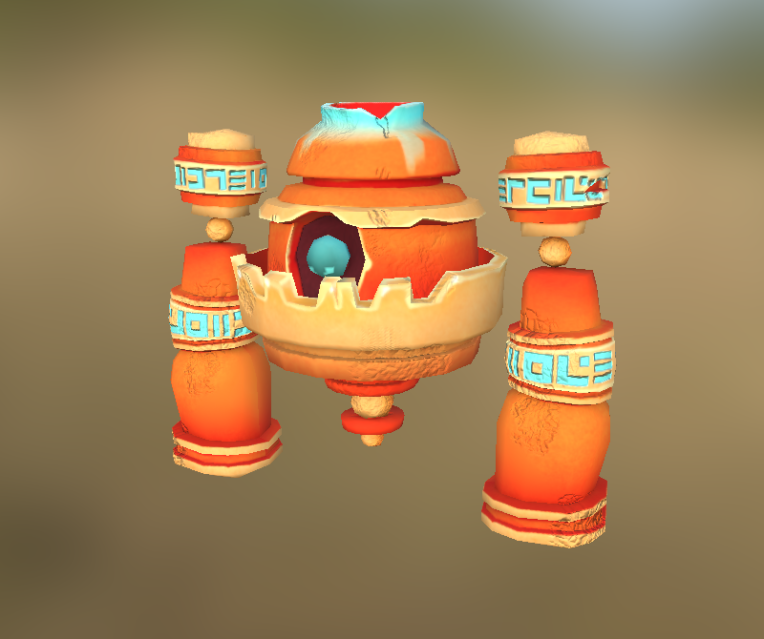
Started out with the ranged enemy, which turned out like this:

print

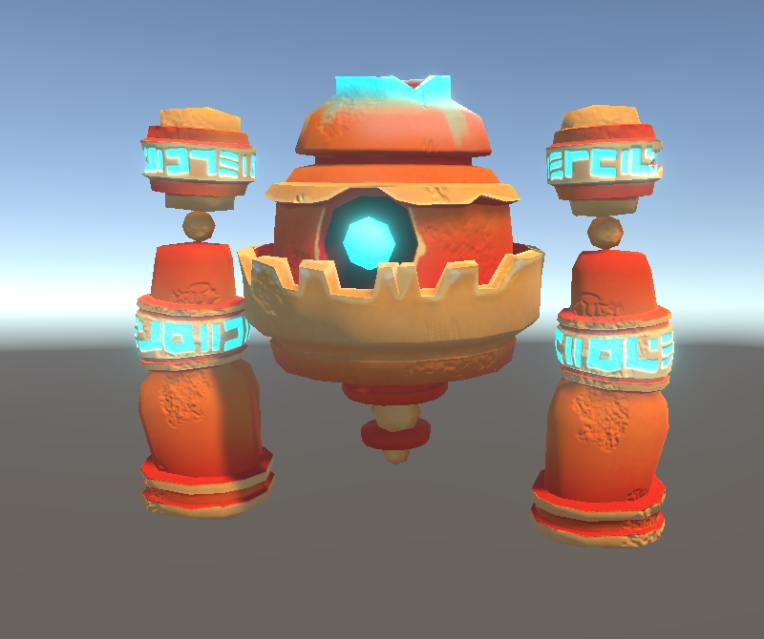
And here he is in Unity, with the emissive channel:

printt

(Sorry for the bad lightning)

The enemies are supposed so be made out of clay, so I focused on orange and blue. Blue because of the contrasting color to Neiva, the main character, and because water is the main problem for Neiva when moving through levels. We decided to try to incorporate blue in the traps and enemies to have a common color for all things being dangerous.

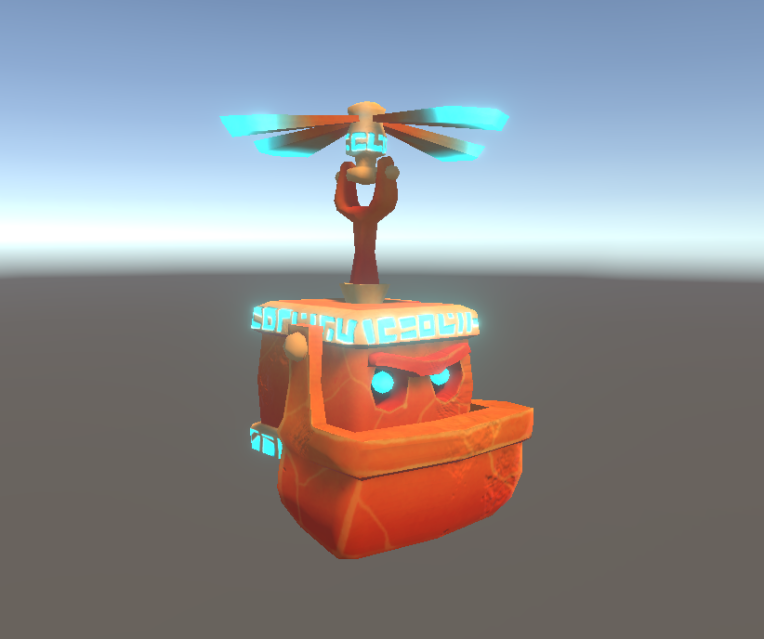
Here’s the similar flying enemy, which will eat all your projectiles if they get close:

And with the emissive in Unity:

flying3

Other than that, I’ve done some small fixes to meshes and prefabs, as well as started the UVWs and textures for traps and other small stuff.

Big Game: Week 2

For the second week, I started working on the base meshes of the enemies and traps. I also had to do some concept art, since we hadn’t completely decided what they should look like. I also put quite a lot of time into creating working prefabs for each mesh.

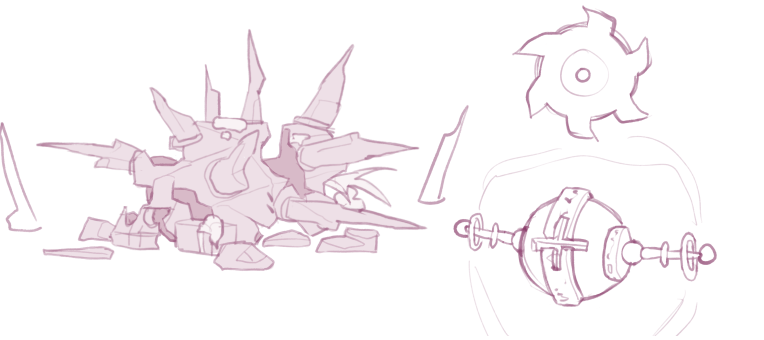
Here’s some concepts I did, which we decided to use:

Above is the flying enemy to the left and the shooting enemy to the right. The flying enemy won’t have a flower to fly with, though. As idle, he will just fly around randomly with his mouth closed but when he senses a nearby soul from the player, he will open his mouth and start to chase the projectile. The shooting enemy will shoot from the top of his head and his middle body will rotate towards the player.

spiketrap

Above is some traps which we will use in the game; to the left is our ”spiketrap”, which we wanted to be more than just spikes. So, we created it as a dead enemy and will also use regular spikes which can be use in roofs, walls and next to the dead enemy. We will also have a ”bladetrap”, as we call it, which will be sawblades moving and rotating on a built trap of wood and spinning wheels. The last trap is ”push-and-pulltraps”, which will work kind of like a magnetic force. There will be two different ones, one that has a plus on the front (like in the picture above) and one with a minus. The plus will push away the projectile and the minus will pull it in. They will also have different colors, to more easily separate them.

Here’s the base meshes of the objects, some as final meshes since I had time to start working with that before I started writing this;


(Kind of) final meshes for the enemies.

Base meshes for some traps.

Also worked with some meshes such as checkpoints and interactable objects. The checkpoint will be just a base with transparent light on the standing plane.

Big Game: Week 1

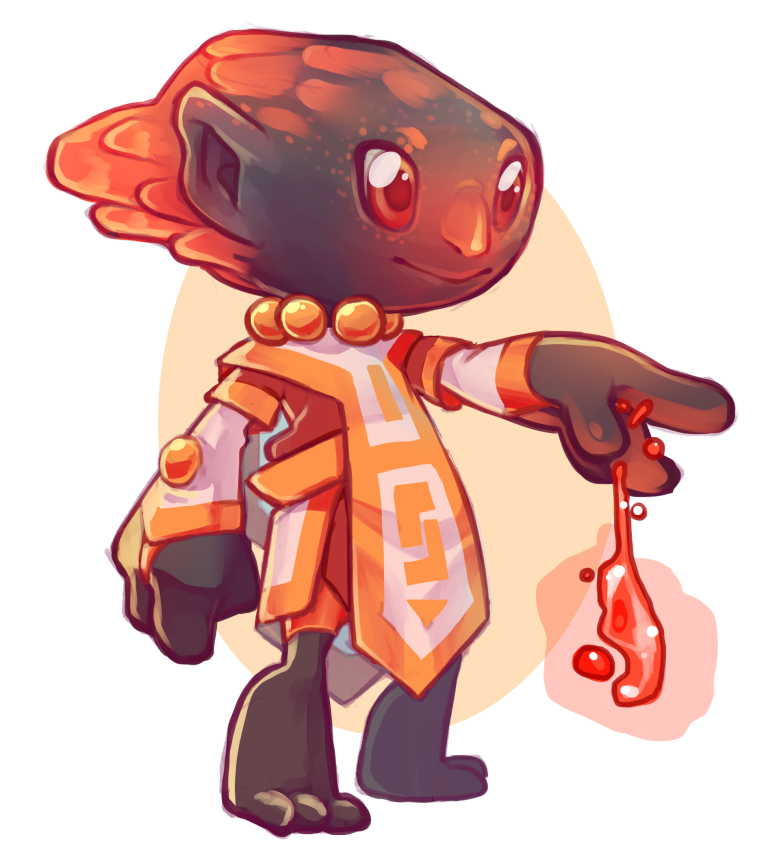
During the first week of production, the main task was to create the player character of our game. Here’s the concept:

boppie

Modeling and creating a UVW of her head was a lot of pain and resulted in some difficulties with distortions when creating the textures, but I eventually ended up with with an acceptable result. Emissive glow would also be a big part of the character design, which meant I had to play around a bit in Unity to figure out how everything worked since I had only used Unreal before starting Big Game project.

Here’s some pictures of the final mesh:

Some elements were changed from the original concept, like for example the pearl necklace which limited her head movement quite a bit. The pearl on her arm were also moved to the flat surface of her hand to avoid distortions when moving and rotating the arm. She’s about 10k tris.

Here’s with the added textures:

We went for hand painted textures with very simple roughness and normals. The only normals are on her head and the only difference in roughness is between her pearls, clothes and skin. Substance Painter, Photoshop CC and Paint Tool Sai was used to create the diffuse, roughness, emissive and normals.

In Unity, the emissive channel works like this:

The bloom effects and such will be tweaked and isn’t the final version. The textures might also get a rework later on in the project, if time allows.

Ambient Pressure: Power-ups with animation

For the final post during this course I decided to talk about the power-ups and their animation. Our game include three power-ups, which are as follows.

  • Light-up: Lights up the whole screen for 3 seconds, then flickers and goes back to dark again.
  • Repellent: This works almost like an invisibility spell, it’s simply a toxic waste that masks the smell of the diver which makes them basically invisible to the enemies for a short while. The diver will have a transparent dark purple color for the duration, this will also start to flicker before it completely disappears.
  • Guiding Arrow: Simply as the name states, it is an arrow which guides the player to the nearest sample. An orange arrow will circle around the diver in the direction of the sample.

We considered it important to have each pick-up animated, to further compel the player to pick it up. It would make the whole game seem more lively. So, for the power-ups I decided to just keep an easy animation where they slowly jump back and forth, with some special animation for the light-up and the guiding arrow which will be seen below.

The first power-up that was completed was Light-up. We all basically saw it as a light in a bottle, so that is what I decided to draw. This is the final version of Light-up:

lightup

The first version of this was a lot more transparent, since I created it working from a darker background than the metallic blue we eventually went with. After feedback from the playtesting, of how it was kind of hard to spot, I made it less transparent to hopefully give a bigger contrast to the background. I am also hoping that the moving light will also aid in making it more noticable.

The second power-up that was created was the repellent. Designing this as something the player should want to pick up, when it is actually toxic waste was a bigger challenge than the other power-ups. We talked about having it as a flask filled with purple liquid and that’s when we decided to give the power-ups a specific appearance; they would all be in something made of glass. I decided to make the repellent as a glass jar filled with purple liquid.

repellent

The third, and final, power-up was Guiding Arrow. I had imagined it from the start as a transparent box with a bouncing arrow inside trying to get out, so after the decision of making all the power-ups out of glass; this was of course what I did. Here is the final version:

arrow

The orange arrow inside will be used as the arrow who guides the player as well, when the power-up is picked up (or ”crushed”) the arrow will escape to the outer range of the Diver’s field of vision and spin towards the nearest sample.